one-pot creamy pasta

Happy Friday, friends. 
The recipe I’m sharing today is not my own.  It was in Martha Stewart’s magazine a few years back.  It was one of those pull-out recipe cards. 

I must admit, I didn’t think much of it when I saw the recipe, but a snowy afternoon with limited ingredients in the house led me to try it.
Holy cow batman!  Is at as good as fettuccini alfredo?  Nope.  Pasta, cream, cheese butter garlic..  not much can compare with that. 

Was it amazing? YES!

Was it easy?  YES!  Easier than making a box of kraft mac and cheese ( which, btw.. it also kind of amazing it it’s fake orange cheese nostalgic way ☺️) 
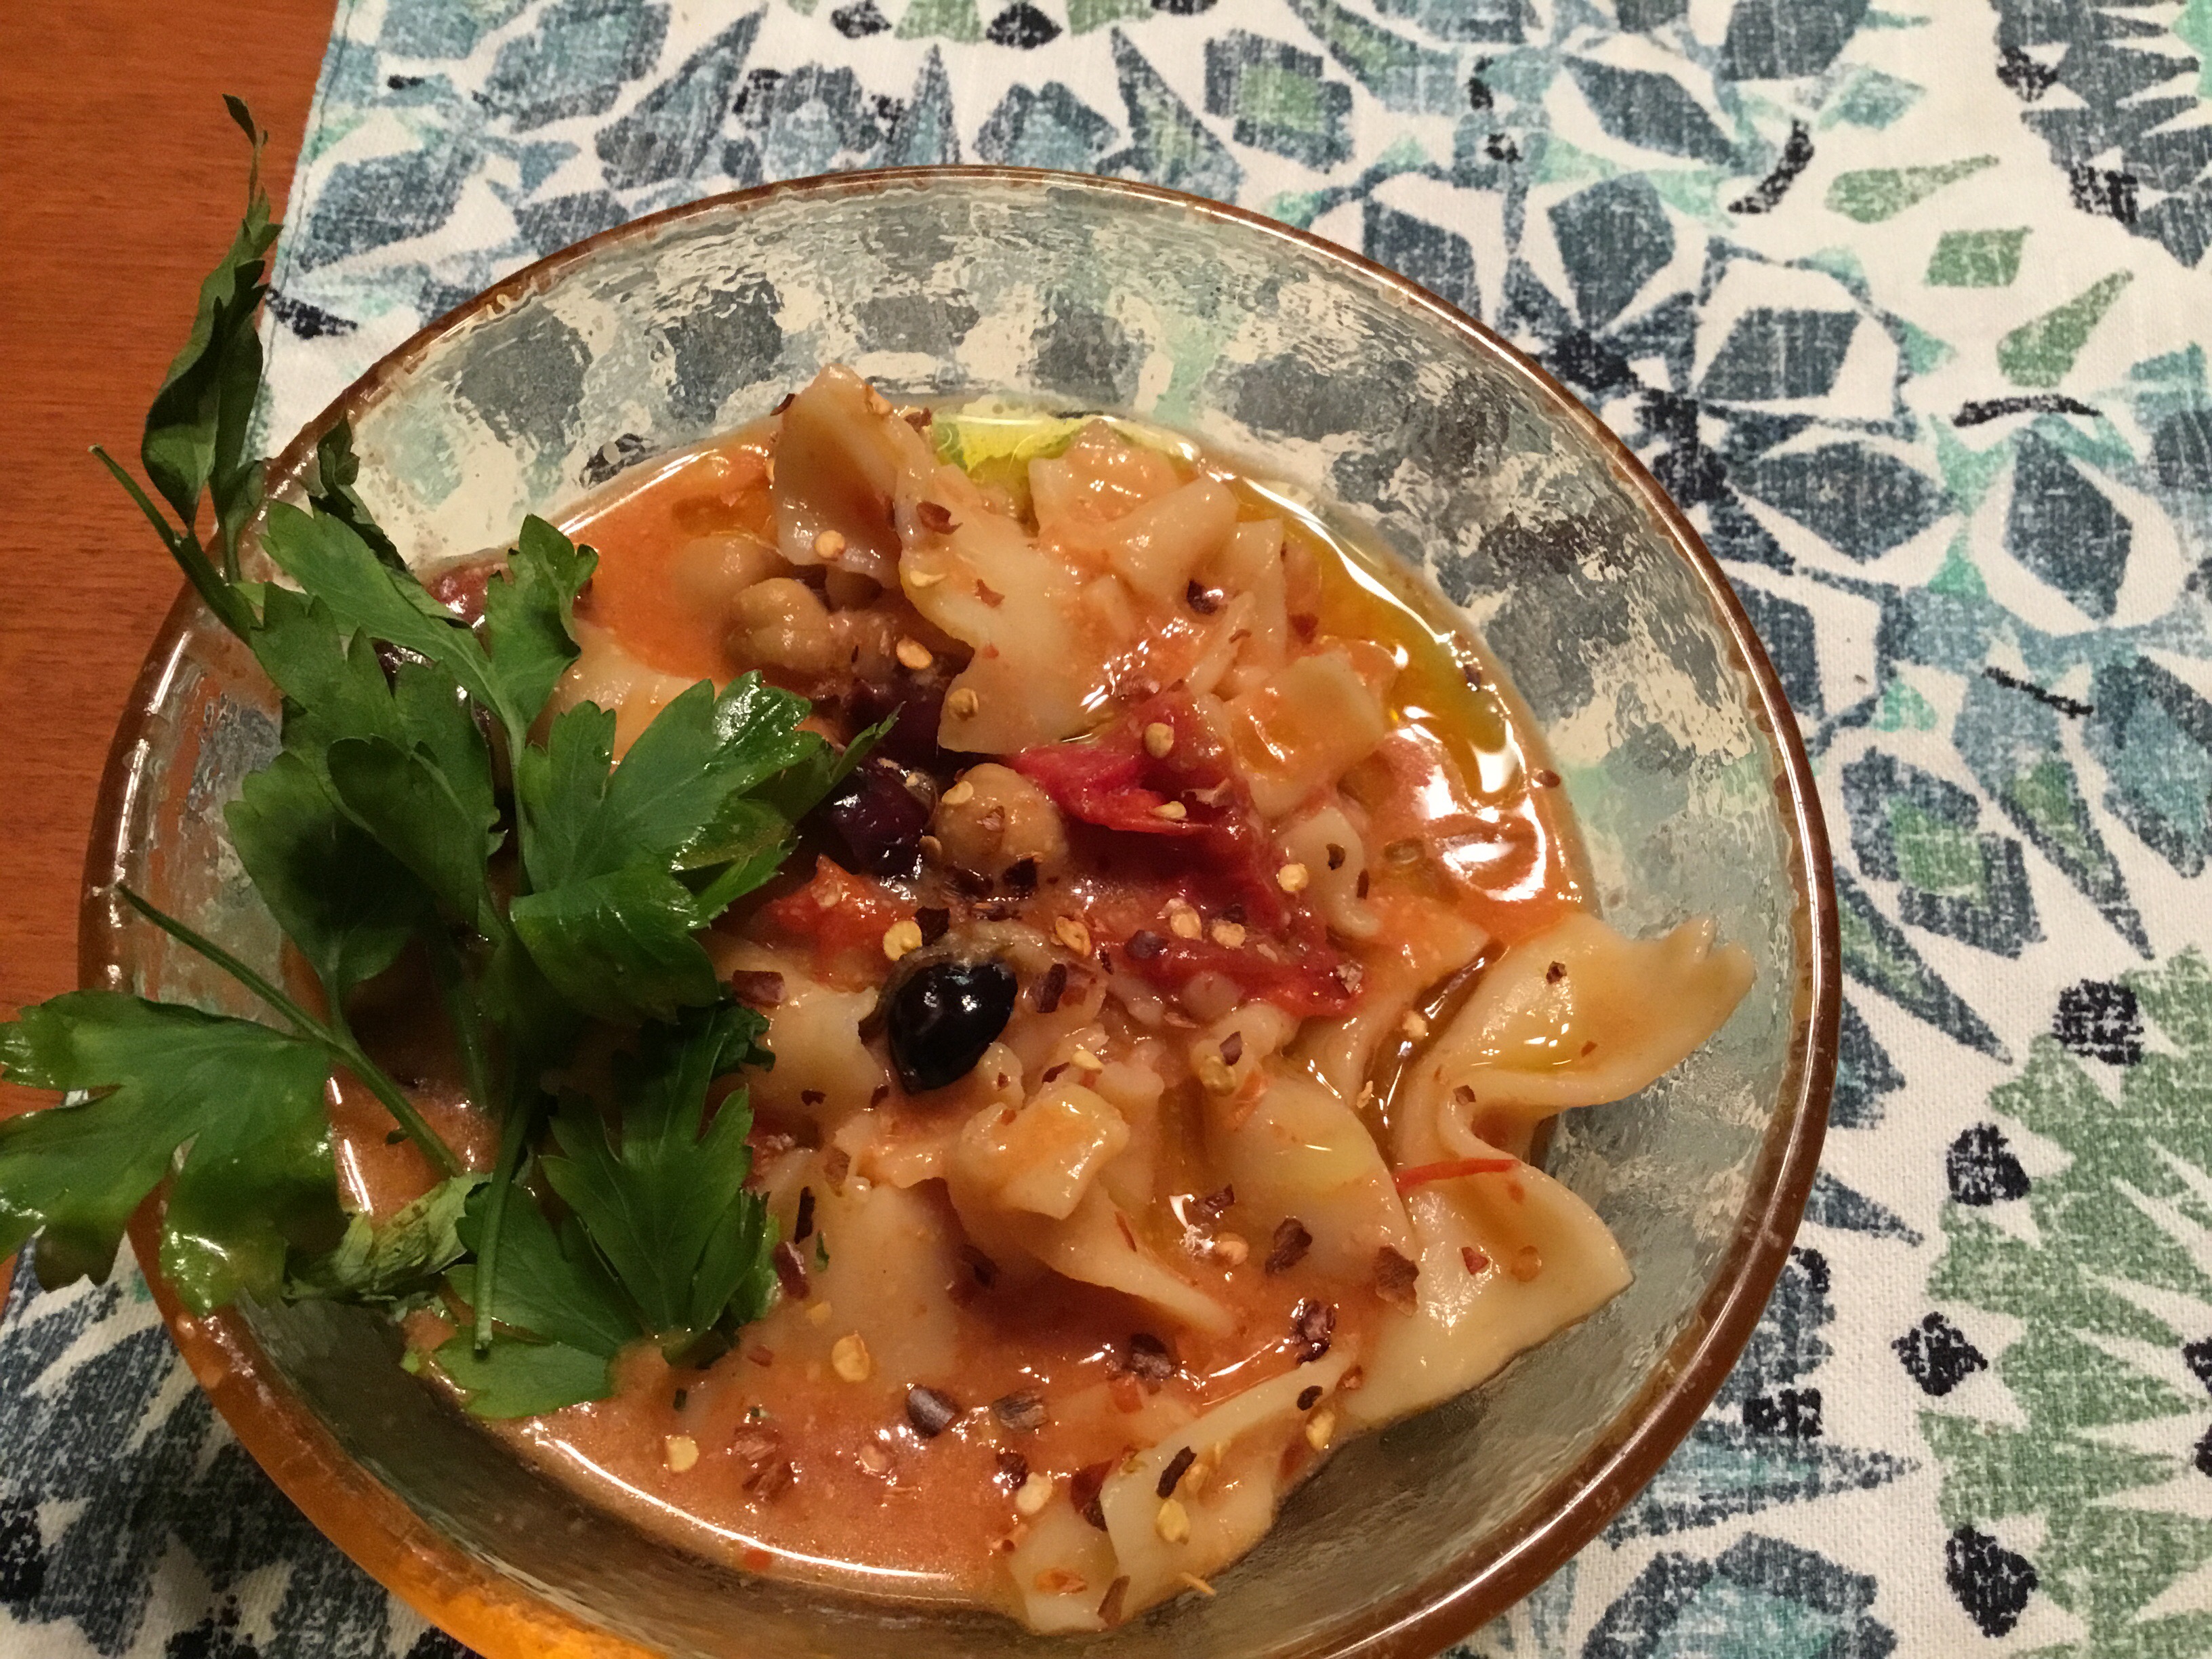
Here’s the original recipe for One pot orecchiette, chickpeas and olives

Admittedly, I’ve followed her recipe to a tee… but I’ve also used it as a guideline to play a little. 
Here’s her original recipe, just subbing the kind of pasta I used 

12 ounce dry pasta ( I had bow ties, so I used bow ties) 

* note..  many companies make ‘no bake’ pasta these days.  For this recipe, just use your regular pasta.  I haven’t tried it with GF pasta, but I’d imagine it would work, just keep an eye on it and add more water if  needed) 

1 can of chickpeas, drained and rinsed 

1/2 cup kalamata olives, pitted ( you can buy them pitted.. don’t fret )

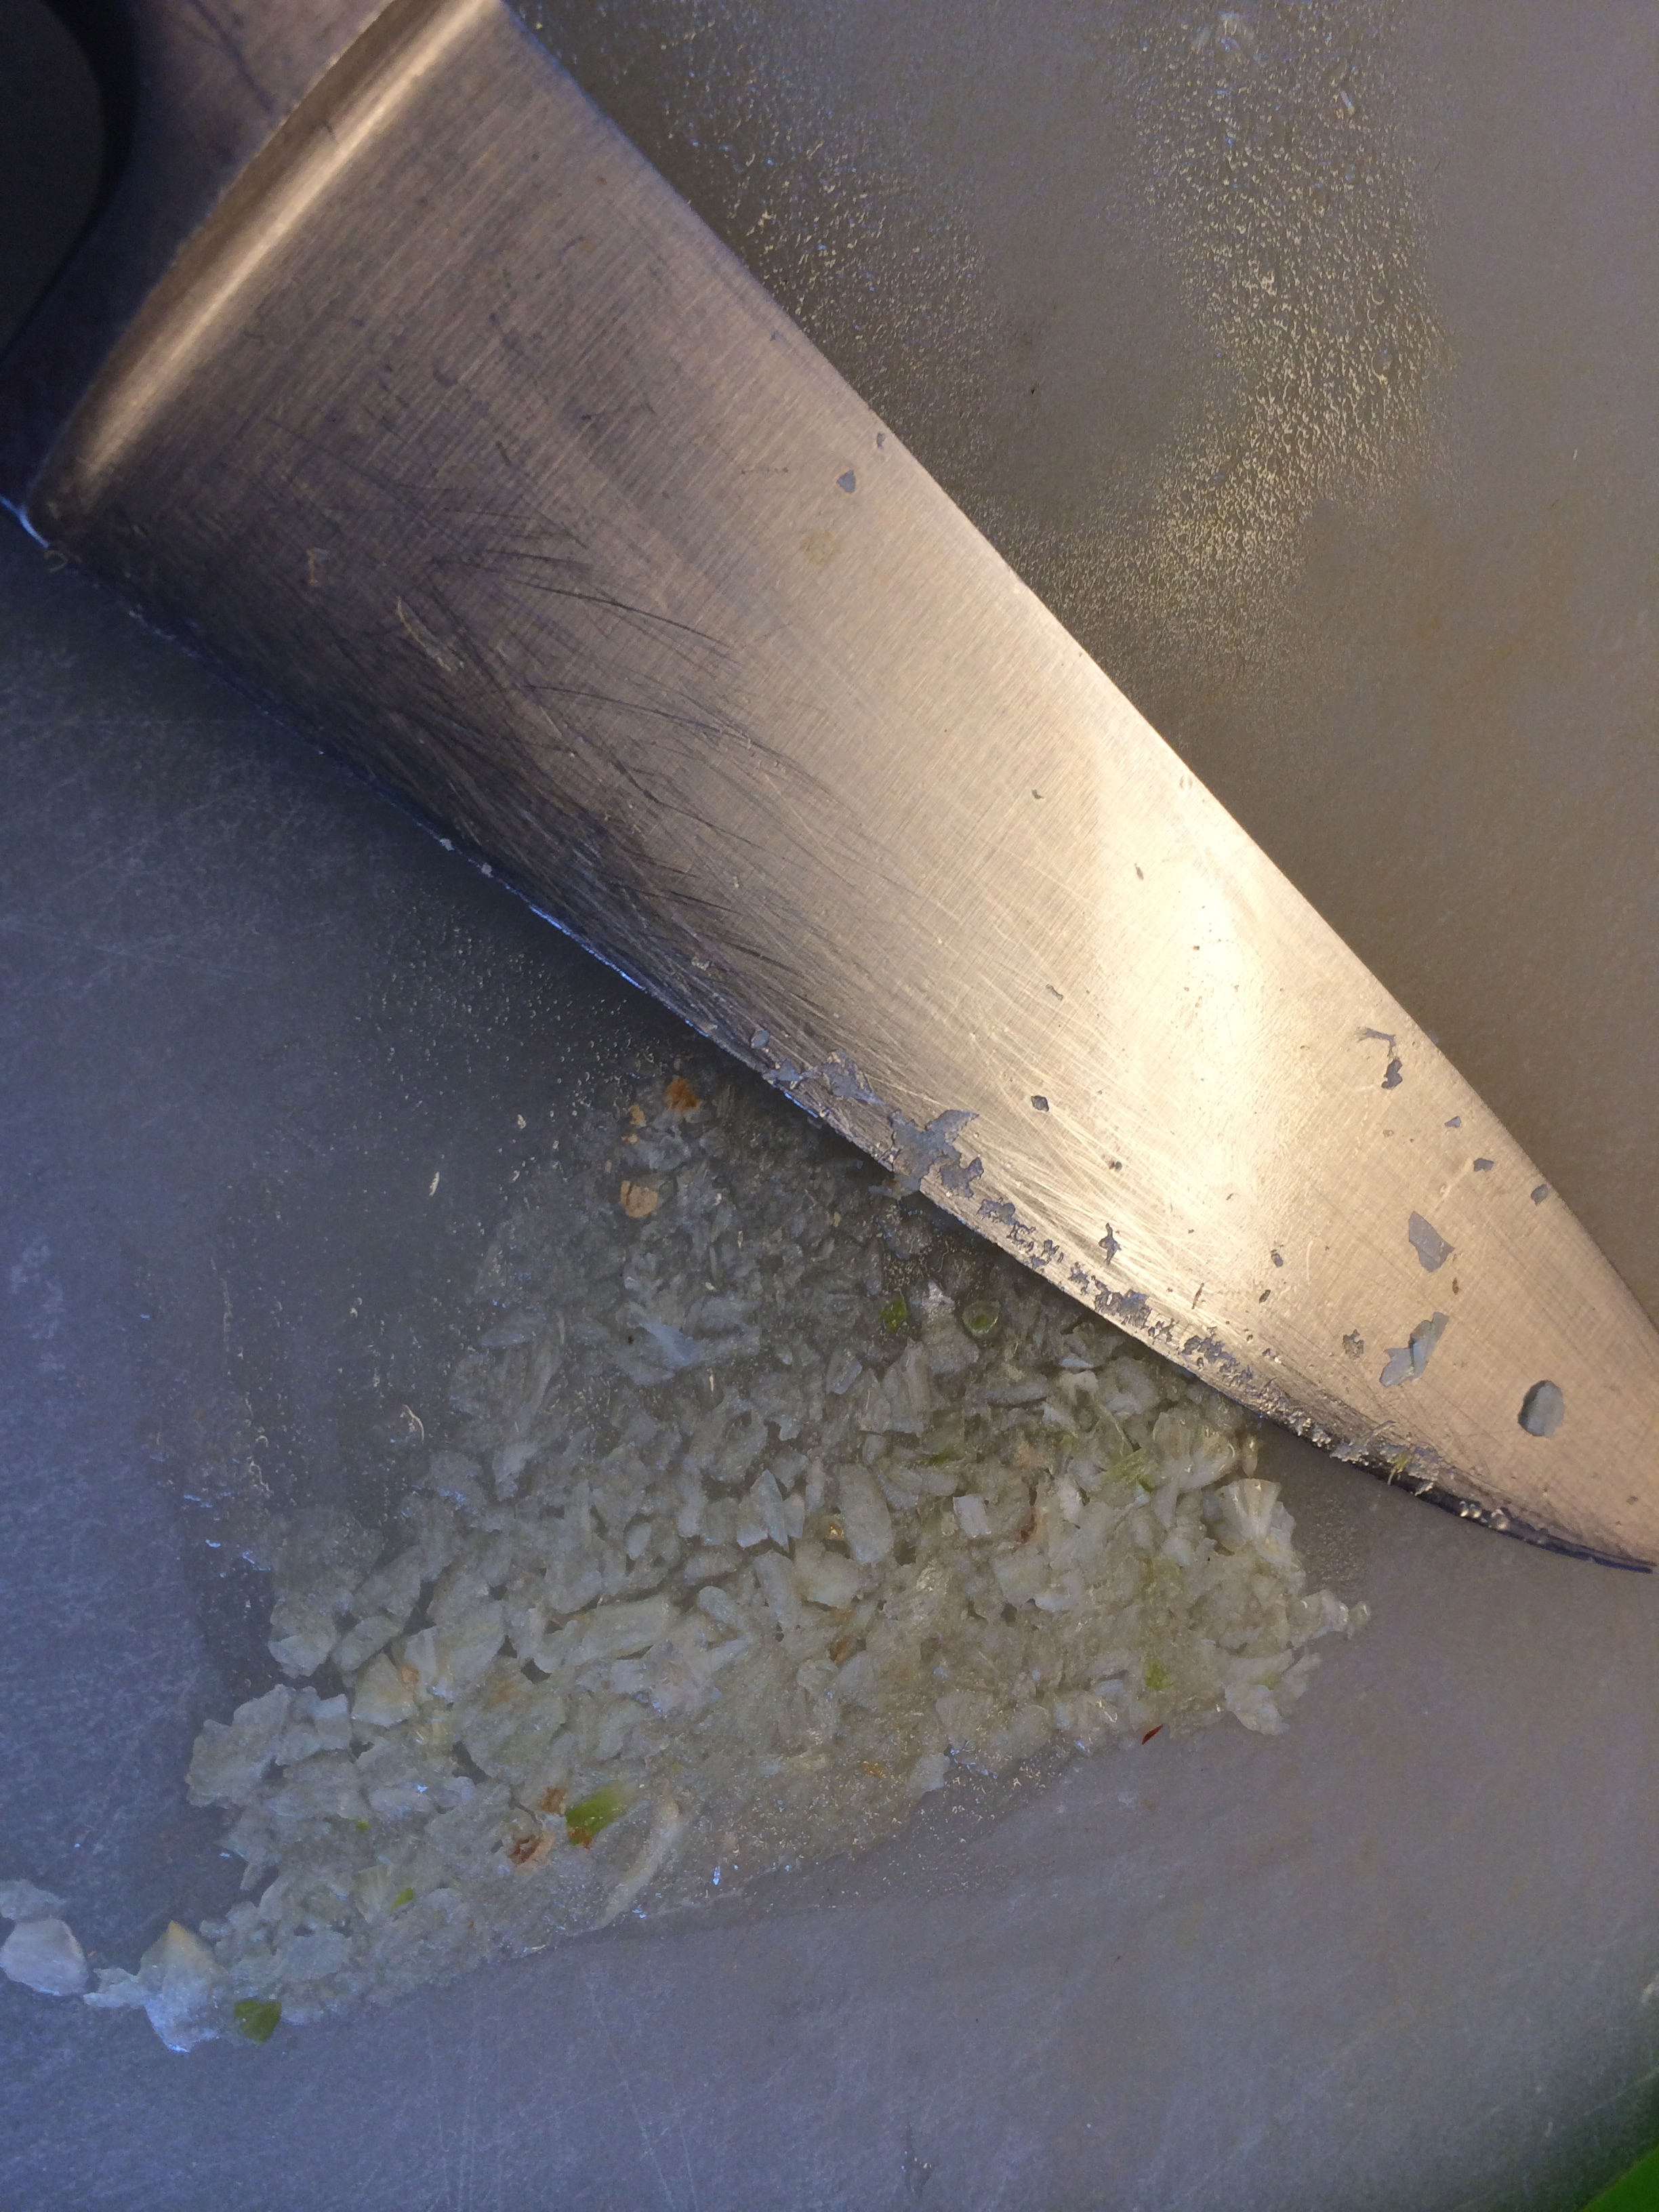
3 cloves garlic, smashed ( or 1 tsp garlic powder ( make sure not garlic salt) 

Sprig of fresh rosemary or 1 tsp dried

3 TBSP extra virgin olive oil 

2 TBSP tomato paste ( buy the tomato paste in the tube.  It’s in the canned tomato isle.  Believe it or not. Whole Foods has one of the least expensive tomato paste tubes.  I believe Trader Joe’s also has one) don’t pay more than 3 bucks for it

( optional.. but I always use in any soup or stew.. small piece of Parmesan rind) 

1/4 tsp red pepper flakes

Sea salt

Ground pepper

1/2 cup grated Parmesan cheese ( I also added a bit on cheddar ends that I had in the fridge )

2 cups baby greens 
Place everything up to cheese in a stockpot. 

Add 5 cups of water 
Bring to a boil, then reduce heat to medium, stirring occcasionally. Check pasta in 12-15 minutes ( thicker pasta will require longer.  Check at 15 min to see). It should be mostly cooked, with just a slight bite to it. 

Turn off heat, but leave pan on burner 

Add the cheese, replace cover for 5 min so the cheese can melt. After 5 min, stir and if cheese still needs longer to melt, cover for additional 5 min.  Discard rosemary sprig, if used. If sauce seems a bit thick, stir in a bit more water until you get a creamy consistency 


Serve with a sprinkle of red pepper flakes 


Please try this!  I have a lot of friends who are just learning to cook.. a lot of girls just on their own, either senior year in college or just out on their own.  This is a great recipe to start to learn to cook 

You can assemble in the morning and add water and cook when you get home from work
You can play with the ingredients…sub out broccoli crowns and cooked chicken for the chickpeas and olives

Or chopped red pepper and cooked sausage for the chickpeas and olives

Or ground beef and onion,  and pepper jack cheese for a Tex-mex flair

Or you can eliminate the cheese to make this vegan. 
Full credit of this recipe goes to Martha Stewart.  I just wanted to share it because it is insanely easy and tastes like it took a lot longer than it did to make. Try it! 
Enjoy!
Ps…. happy birthday to my long-time friend, Laurie! 🎉🎉🎉🎉🎉🍷🍰😘

brown sugar chicken 

I told myself I was going to post more.  I take the pictures, I think of what to say, and I never actually do it.  I made this recipe at the beginning of last month. While scrolling through photos, I came across these and decided to share.  This is perhaps the easiest chicken dish I’ve ever made. This simple dish has so much flavor.  My husband devoured it and I wish I had made more…

Brown sugar Chicken

Serves 2

2 boneless skinless chicken breasts

1 shallot, peeled and sliced 

2-3 tablespoons brown sugar

1 teaspoon garlic powder

1 tablespoon butter

1 teaspoon coconut oil

Salt and pepper 

Pine nuts for garnish ( optional)   

Start by seaoning chicken with salt, pepper and garlic powder.

In a cast iron pan, heat the coconut  oil over medium heat 

  
    Sauté on each side for about 5 minutes.  


Add shallots and let cook for a few minutes.
  

Add butter and brown sugar;  stir together, turn heat to low and cover. 


Cook for 5- 20 minutes ( depending on thickness of chicken) internal temperature should be 165. 
  
Serve chicken with the sauce and pine nut garnish ( if using) 

It’s crazy how much flavor this dish ☺️
my neice had asked me awhile ago to share some simple recipes with great flavor.  I think this fits the bill perfectly!  
enjoy 😎

one pot roast chicken with vermouth sauce 

hiya friends! 

I’ve been roasting chickens for what feels like my whole life…..  It’s such a homey meal and I’m positively addicted to Making bone broth with the leftover bones.

But the mess after roasting a chicken. Oiy. Vey. The cleanup was never something that I look forward to. 

For about the last year, I’ve been roasting a tad differently, and it’s worked great for me, cleanup is almost nothing, and well, it’s just awesome 

ONE POT ROAST CHICKEN WITH VERMOUTH SAUCE 

1- 4-5 pound chicken, giblets removed

1/2 onion, roughly chopped

2 carrots ( no need to peel) rough chop 

1 celery stock, rough chopped ( I didn’t use in this recipe, but I usually do ) 

Sea salt and pepper 

Flour ( I like brown rice flour ) 

1/2 cup dry vermouth 

1/4-1/2 cup low sodium chicken broth 

Meat thermometer ( under 10 at most stores) 

**Cast iron skillet 

Start by preheating over to 425 degrees.   

Salt and pepper both inside and outside of chicken 

Place all veggies in cast iron skillet 

  I’ve thrown in a few over ripe tomatoes here….  Not necessary, but added another layer of flavor. 

That’s the fun part of this recipe.. Use what you have, make it your own.   You can add fennel bulb, parsnips, lemon, Potatoes..  Herbs..  Have fun with it! 

Place seasoned chicken on top of chopped veggies, strategically placing so that there is a little bit of space underneath 


Place in preheated oven and roast for about 20 minutes, until crust looks brown and crispy.   Turn temp down to 325 and continue to roast until thermometer inserted in deepest part of thigh ( without touching the bone ) reads 165. ..  

( juices Should run clear, not pink,from where you insert thermometer) 

Using potholders, remove pan from oven.  


* here’s a napkin for you * 😉 

Let rest for a few minutes, then carefully transfer chicken to cutting board, allowing it to rest longer. 

Making the sauce…….  

Using a slotted spoon, remove veggies and set aside. 

Drain all but about 1-2 tablespoons of accumulated fat. Add flour and using a fork or whisk,  mix flour and fat together until it looks crumbly.  Stir mixture continuously for about a minute, 

Turn heat off, add vermouth slowly mixing the whole time, then turn heat back on to medium, and allow to thicken. Add broth a little bit at a time, until desired thickeness. 


(Ps… You are  Cleaning the pan as you go!) 

You can serve the sauce like this, but for a smoother sauce, strain through a fine-mesh strainer, using a spatula to get out every last bit . 


Cut the chicken breast off each side In one pieces, then slice vertically.   Remove wings and legs. 

Serve with sauce and veggies! 

Finished photo here

Simply rinse your cast iron skillet under warm water, using a brush to remove any last bits, wipe down with a pair towel and brush with a little bit of oil.   

Cleanup done! 

***. Cast iron skillets…  

Ove my years I have used many different kinds of cookware,   In my opinion, there is none superior to the same thing our grandparents used, cast iron. 

They are inexpensive, ( under 20 at your local hardware store) 

They do need to be seasoned, but this is easy and once you do it properly, you should rarely have to do it again 

You can also find them at yard sales ( I would love to have know this magic earlier, because I would have treasured a cast iron skillet from either mine or my husbands’ grandparents ) 

Don’t let rust on a pan at a sale  scare you! You can easily scrub it off, and re season.  A cast iron skillet should last forever! 

Never ever, ever use soap on the skillet.  This is so important . 

Seriously….  This might be the best 20 bucks you’ll spend in your kitchen! 

Save all of your bones and scraps… Next up.. Fail-proof stock! 

strawberry and balsamic chicken summer salad

Good morning, friends!

I made this recipe last week, just sort of opened the fridge and it all came together.

We liked it SO much,that I made it again this week!

And you should too!

Start by making your marinade

20140724-091958.jpg

1/3 cup of balsamic vinegar
1/4 cup brown sugar
2 TBSP low sodium soy sauce ( use GF soy suave to make the dish GF)
1 clove garlic, roughly chopped
1/8 c olive or canola oil
1 handful fresh parsley
1 small onion roughly chopped
Dash sea salt

20140724-092333.jpg

Dig out your trusty smoothie maker. And blend

20140724-092402.jpg

Reserve about 1/4 cup of marinade for dressing base , being careful not to contaminate.

Pour the rest of the marinade over the chicken and let sit for 3-4 hours

20140724-092602.jpg

When ready to cook, discard marinade that chicken was hanging out , and preheat girl to 375 ish

20140724-092703.jpg

Grill chicken breasts for about 7-8 minutes per side. Use a meat thermometer to make sure internal temp gets up to 165.

You’ll get some color on these, don’t worry! It’s the sugars in the balsamic and brown sugar carmalizing. And, it’s delicious!

When chicken has reached 165 in the thickest part, remove from heat and let rest.

Make your dressing…

To the reserved marinade mix, add 1/4 cup of extra virgin oil oil, and black pepper. Re-whirl the dressing in your smoothie maker ( it should look a bit creamy due to the oil emulsifying )

Next, assemble your salad

Place greens of your choice in a serving bowl. Chop up about 1/2 pound ( or more) of fresh strawberries. Sprinkle 1/4 cup of chopped walnuts ( toast them first for a deeper flavor) then add about 1/3 cup of soft cheese sprinkled all over the top.

( first time I made this I used goat cheese, second time, I used a soft feta.. Both were amazing! … Use what you have )

Next, slice your chicken ( it should still be warm) and top on top of the cheese and let sit for a minute ( your cheese layer is getting very happy )

20140724-093639.jpg

Drizzle the dressing atop chicken and toss when ready to serve

Yeah. You should totally make this.

20140724-093819.jpg

mock~tails, home made fruit vinegars annnd..

Spaghetti squash casserole.

yes.

again.

After help from my friends and family on facebook, I think that I’ve fixed the issue. Now I’m sure some of you are downright sick of hearing about it ( I’m kinda getting sick of typing it) but I still feel the need to share that post in its’ entirety, so we will start with that.


( feel free to skip if you just can’t bear to have your eyes view it again~ it’s ok, I’ll still love you. Like lots. )


friends. If you are connected with me on my  facebook page , then you’ve had a sneak peak at what’s cooking in my kitchen

Get yerself a sketti squash, because trust me, you will want to make this!

I mentioned in my massaged kale salad post how I am obsessed with True food kitchen

I’ve eaten here many times and have tried many things on the menu. ALL fabulous.

Twice now, I’ve had friends order the spaghetti squash casserole, and both have raved about how good it was.

( truth be told, both friends offered me a bite, of which I accepted  and wow! I just knew I had to make it at home)

I did a little research * puffy heart google* and voila! found the recipe!

click the link for complete recipe

Dr Andrew Weil, Spaghetti Squash casserole


Ingredients
1 spaghetti squash
2 large carrots, diced
2 stalks celery, diced
1 large yellow onion, diced
1 red bell pepper, diced
2 tablespoons extra-virgin olive oil
1 large can (28 ounces) crushed tomatoes
Red pepper flakes
1 teaspoon dried basil
1/2 teaspoon dried oregano
Pinch of ground allspice
3 cloves garlic, chopped
3/4 pound part-skim mozzarella
1/2 cup grated Parmesan cheesenow since I’m home with a healing pup, I had to improvise the recipe just a littleI did not have the peppers, but I did find a sad little jalapeno in my crisper drawer, and we like it hot 😉 so I used that in place of the red and yellow peppers.

spaghetti squash casserole ingredients

Start by cooking the squash. The recipe says to add entire squash into a big pot of water, bring to a boil for 50 minutes.


check on pup 

Now, I usually cook squash in the oven but I was intrigued to try this method. So I did.

My only comment would be that cooking it in the oven it was easier to separate the seeds from the flesh, but over, I would cook the squash either way.

while the squash is cooking ( whichever way your little heart desired) Chop up your veggies

Add a small amount of olive oil to a pan ( I’m a die hard believer in cast iron.. I’ll explain why if ya wants to know 😉  )


add the onions and carrots to hot oil, season with a bit of salt and cook for 5 min


check on pup 

next, I  added the the pepper and celery with a dash of red pepper flakes

squash filling

allow to saute for about 10 minutes, until veggies were soft. Taste for salt, if it needs a little more, go ahead and knock your self out 😉

* I kept adding little bits of water throughout so that the veggies didn’t dry out and stick while softening.. maybe 2 tablespoons at a time each time I stirred it ? )


check on pup 

The recipe called to squeeze the garlic in, but I rid myself of my garlic press years ago, as it only had that one purpose, and its easy enough to smash garlic with the side of a chef’s knife. garlic smash

f you have a press, by all means use it

add the crushed tomatoes m sprinkle of allspice (the secret ingredient, we discovered) , the garlic.

now you may have noticed the dish of roasted tomatoes.  I had some maters that were to ripe to eat raw, so I roasted them like I did when I made my

roasted garlic and tomato soup


squash filling

I  added these sweet babies  in addition to the crushed tomatoes

I also added a sprig of rosemary.

I hate to follow directions 😉

spaghetti squash


and btw~ this smelled heavenly 

Next I used a pair of tongs to remove squash from boiling water ( CAREFULLY) and place on a cutting board until cool enough to cut


scoop out seeds ( if you cooked it in the oven, you’ve already done this. great job, you overachiever, you  😉 )


spaghetti squash filling


add to tomato mixture and stir


check on pup 

Now full disclosure… since I was cooking this for just Scott and myself, I spooned out half of the tomato mixture and reserved for another recipe ( veggie chili, perhaps? ) and only used half of the spaghetti squash itself.   Had I known I could have halved the recipe, but being my first time making it, I wasn’t thinking.


spaghetti squash filling


I mean just look at this! Incredible.


next, layer 1/2  the squash mixture in baking dishes , add 1/2 the cheese, the rest of the squash mixture, and top with remaining cheese


baked spaghetti squash


guess which one was mine 😉


As far as the cheese goes, I used shredded because I had it and on Sunday when I played around with

smoked tofu crumbles, I smoked a few mozzarella balls as well ( just curious how it would come out) so I cut those up and topped  our dishes with a bit of that crazy cheese flavor.

I baked it in a 350 over for about 20 minutes, topped with shredded basil and a tiny drizzle of olive oil


Baked Spaghetti Squash


do I have your attention yet?


baked Spaghetti squash


yeeeeeaaah…  this was pretty awesome.  and healthy? CRAZY healthy!

If you would like to make this vegan, substitute Daiya cheese. simple!

My friend, Cindy stopped by yesterday to visit with me and brought me lunch. From where? True food of course!

I had the edamame dumplings and they were incredible. Together we disected the taste and came up with what we think would be a good recipe.


I have my next challenge!


true food edamame dumplings


Thank you, Cindy, for lunch and the company 😉

My next immediate project is making puppy ice cream or peanut butter biscuits  With all of the treats I’ve been given Fen, I’m starting to run low and need to last until the weekend when Scott is home


healing Fenway


my sweet girl ❤


al’ight….  since I’ve spent 46,000 hours writing,losing,finding,re~losing, re~ finding,fixing and re~ posting this…. you just might wanna make this… and let me know 🙂


ok. next. While I was hanging out with my sweet pup this week, I watched a lot of Food Network I came across a show that was focusing on Mocktails… you know, cocktails sans alcohol.


Kelsey Nixon made blackberry sipping vinegar to use as a base for a mocktail recipe.

I was curious, so I used the base/ idea of her recipe to make Strawberry~basil vinegar.

( because that is what I had in~ house ..


strawberry~basil vinegar

start by using equal parts fruit-sugar. I used a cup of each and added shredded basil


mash fruit and sugar up well and cover with plastic wrap and refrigerate ( I love re- using rubber bands from veggies all over the kitchen 😉 ) for 2 days , stirring occasionally

On day 3, add equal amount ( 1 cup )  of apple cider vinegar ( I swear by Bragg’s.. highly worth the extra buck or two ) and stir.

The next day, using a fine~ mesh strainer, strain all solids out, using a flexible spatula  to press out every last bit of liquid ( you do NOT want to waste any )


strawberry- basil vinegar

to make your life easier ( because let’s face it, it’s all about you 😉 ) strain it into a dish or measuring cup with a spout for easy pouring.

Pour into a jar and store in fridge!


( I have a batch with Meyer lemons in the fridge now. I’ll let you know how it comes out )


strawberry-basil vinegar

I made a mocktail by pouring about an ounce of the vinegar over some ice, topping with sparkling water and a wedge of lime.


strawberry-basil mocktail


There is something about the vinegar that really elevates this drink., It feels like a special drink

In the show, Kelsey used an infused tea as well ( click the link up there for complete recipe) but I’m a simple girl and this drink suited me just fine.

So for my friends out there who don’t drink alcohol, for one reason or another, here’s a new option for you!


It is also a Crazy- delicious base for a salad dressing..  more on that tomorrow.


On another note, my PT is going well. Really well. my PT recommended that I get a theraputtic massage to break up some of the scar tissue in my hamstring from the tears. ( not my torn ACL leg that i just had surgically fixed, the OTHER leg that went into crazy hyper horrificness thanks to being on crutches post- surgery

The massage therapist ( This was NOT a relaxing massage AT ALL, btw) worked on my hips, glutes, ( where one of the tears are) and then she moved to my back.

She discovered that I have a muscle along my spine ( not the spine itself) that is all twisted up and is sending pain signals down my leg.

After 60 minutes with her, I noticed a difference ( the next day)

I was shocked to realize halfway through the day that I wasn’t struggling while doing simple things like just walking 

So my PT is also working on this and is having me start some strength training , lots of squats, single-leg squats and lunges of all angles.

and I’m feeling good for the first time in a LONG time.

I asked Matt ( PT) about possibly training for a 5k. He said he’ll let me start jogging ( under his supervision) on the treadmill in 2 weeks.

He humbling shared with me that he came in in the top 20 of the Boston Marathon last year. Not percentage, but overall.

I’m uber- impressed.

Friday I made a last minute descison to sign up for an Earth- Month 5k around the corner from my house. ( with his approval)

I went into this knowing that walking was the only option and that my time would not matter.

I had 2 friends who signed up with me.

we finished dead last, but that didn’t matter. We did it.

I had my first benchmark for races here in Colorado and the only thing that I can expect from here is to get better and move forward..

I’m ready

Aveda earth day race

I hope that your weekend was fabulous!

xo

baked spaghetti squash… via true food kitchen

friends. If you are connected with me on my  Facebook page , then you’ve had a sneak peak at what’s cooking in my kitchen

Get yerself a sketti squash, because trust me, you will want to make this!

I mentioned in my massaged kale salad post how I am obsessed with True Food Kitchen

I’ve eaten here many times and have tried many things on the menu. ALL fabulous.

Twice now, I’ve had friends order the spaghetti squash casserole, and both have raved about how good it was.

( truth be told, both friends offered me a bite, of which I accepted  and wow! I just knew I had to make it at home)

I did a little research * puffy heart google* and voila! found the recipe!

click the link for complete recipe

Spaghetti Squash Casserole

Ingredients
1 spaghetti squash
2 large carrots, diced
2 stalks celery, diced
1 large yellow onion, diced
1 red bell pepper, diced
2 tablespoons extra-virgin olive oil
1 large can (28 ounces) crushed tomatoes
Red pepper flakes
1 teaspoon dried basil
1/2 teaspoon dried oregano
Pinch of ground allspice
3 cloves garlic, chopped
3/4 pound part-skim mozzarella
1/2 cup grated Parmesan cheesenow since I’m home with a healing pup, I had to improvise the recipe just a littleI did not have the peppers, but I did find a sad little jalepeno in my crisper drawer, and we like it hot 😉 so I used that in place of the red and yellow peppers. 

IMG_3833


Start by cooking the squash. The recipe says to add entire squash into a big pot of water, bring to a boil for 50 minutes.


check on pup 

Now, I usually cook squash in the oven but I was intrigued to try this method. So I did.

My only comment would be that cooking it in the oven it was easier to separate the seeds from the flesh, but over, I would cook the squash either way.

while the squash is cooking ( whichever way your little heart desired) Chop up your veggies

Add a small amount of olive oil to a pan ( I’m a die hard believer in cast iron.. I’ll explain why if ya wants to know 😉  )


add the onions and carrots to hot oil, season with a bit of salt and cook for 5 min


check on pup 

next, I  added the the pepper and celery with a dash of red pepper flakes


IMG_3835


allow to saute for about 10 minutes, until veggies were soft. Taste for salt, if it needs a little more, go ahead and knock your self out 😉

* I kept adding little bits of water throughout so that the veggies didn’t dry out and stick while softening.. maybe 2 tablespoons at a time each time I stirred it ? )


check on pup 

The recipe called to squeeze the garlic in, but I rid myself of my garlic press years ago, as it only had that one purpose, and its easy enough to smash garlic with the side of a chef’s knife. garlic smash

If you have a press, by all means use it

add the crushed tomatoes m sprinkle of allspice (the secret ingredient, we discovered) , the garlic.

now you may have noticed the dish of roasted tomatoes.  I had some maters that were to ripe to eat raw, so I roasted them like I did when I made my

Creamy Roasted Tomato and Garlic soup

I  added these sweet babies  in addition to the crushed tomatoes

I also added a sprig of rosemary.

I hate to follow directions 😉


IMG_3838

and btw~ this smelled heavenly 

Next I used a pair of tongs to remove squash from boiling water ( CAREFULLY) and place on a cutting board until cool enough to cut

IMG_3842


scoop out seeds ( if you cooked it in the oven, you’ve already done this. great job, you overachiever, you  😉 ) spaghetti squash filling


add to tomato mixture and stir


check on pup 

Now full disclosure… since I was cooking this for just Scott and myself, I spooned out half of the tomato mixture and reserved for another recipe ( veggie chili, perhaps? ) and only used half of the spaghetti squash itself.   Had I known I could have halved the recipe, but being my first time making it, I wasn’t thinking.

IMG_3846I mean just look at this! Incredible.


next, layer 1/2  the squash mixture in baking dishes , add 1/2 the cheese, the rest of the squash mixture, and top with remaining cheese

baked spaghetti squash

guess which one was mine 😉


As far as the cheese goes, I used shredded because I had it and on Sunday when I played around with

SMOKED TOFU, I smoked a few mozzarella balls as well ( just curious how it would come out) so I cut those up and topped  our dishes with a bit of that crazy cheese flavor.

I baked it in a 350 over for about 20 minutes, topped with shredded basil and a tiny drizzle of olive oil

Baked Spaghetti Squash

do I have your attention yet?


baked Spaghetti squash

yeeeeeaaah…  this was pretty awesome.  and healthy? CRAZY healthy!

If you would like to make this vegan, substitute Daiya cheese. simple!

My friend, Cindy stopped by yesterday to visit with me and brought me lunch. From where? True food of course!

I had the edamame dumplings and they were incredible. Together we disected the taste and came up with what we think would be a good recipe.


I have my next challenge!true food edamame dumplings


Thank you, Cindy, for lunch and the company 😉

My next immediate project is making Frozen Pup treats or Home made Peanut butter biscuits  With all of the treats I’ve been given Fen, I’m starting to run low and need to last until the weekend when Scott is home


IMG_0820


My sweet girl ❤

Congrats, friends.. you’ve almost made it through humpday!


oxox


smoked tofu tacos with chipotle lime sauce

Howdy, friends. How have you all been ? Miss me much?   I’m happy to report that I’m successfully recuperting from knee surgery. It’s been difficult having restrictions, but I’ve done everything that I was supposed to, and although I’m still in rehab ( and will be for awhile) I can do just about anything ( with restrictions)     but not ski   until the FALL!

IMG_0715

  And believe it or not, the day I got my brace off, guess who was diagnosed with a torn ACL and lateral miniscus?     Image     My sweet pup.   She he had her surgery on Friday and is home recuperating, just like her mama did  image     She’s such a little copycat!

I’ve been cooking a lot again.  Trying to cook healthy meals.

and I’ve been sharing them with my friends   and out of the blue, it hit me today , duh? Why am I not writing about all of this?

My mama taught me that it’s nice to share, and I should share more.

So here’s what I made today smoked tofu I didn’t have a recipe, I just had an idea   I already had had my grill set up for smoking a pork shoulder so I thought, why not use the extra space  for smoking something else?   image     I pressed the the water out of a block of tofu, then broke it up  in an oven safe dish and placed it on the grill. I “scrambled” the tofu about once every 20 minutes and after 1 1/2 hours, I had this !

image

which I turned into this!

IMG_3827

I simply used a very low flame to toasted a corn tortilla

IMG_3822then I topped with a red cabbage slaw that I made using the homemade vegan mayo recipe that I found last week ( and Im overly impressed by this )

IMG_3828

Im a mayo snob, and I was so impressed by this that I will never buy mayo again.  Plus, since its vegan, it has no cholesterol, which makes it healthier for those who have to monitor that.

And the white sauce is non fat Greek yogurt with chili powder and cumin and lime juice mixed in

IMG_3827

If you think you don’t like tofu, you probably haven’t had it prepared properly.

This was AMAZING! and super healthy!

If you don’t have a smoker, you can easily soak some wood chips in water for an hour, then add the chips and a little bit of the water in a small foil packet and place on your grill ( heated to a low temp.. 250degrees max) and cover the lid on the grill and the smoke will circulate and create the fantastic smokey flavor.

whelp, friends… I have a certain someone that needs a little love…  but I’ll be back.  up next is a tasty casserole featuring this bad boy IMG_3829

ciao, bellas!

there’s a turkey in the backseat…

howdy friends!

I know that Thanksgiving seems like it was sooooooo far away, giving the shopping weekend that followed, but I had a few things to share with you and couldn’t get around to it until now, so do me a favor.. fire up the Delorean and come back to Turkey day with me… just for a minute ( or 10 )

;

a few of you have asked me what I did with Theo after his 2 day salt spa bath….. when I was ready to put him in the oven, I removed hime form the brine.. rinsed him and patted him very dry with paper towels. I place some carrots, celery, onions and fresh herbs in the bottom of a roasting dish , the placed a roasting rack on top ( this makes the gravy extra yummy ) I stuffed the cavity with fresh herbs, onions, lemon and clemetines. Trussed him, then stuck a few fresh sage leaves between the skin and the breast an brushed melted butter all over him. Season with salt and pepper.

;

place on bottom shelf ove 425 degree oven for 30 minutes… then reduce heat to 325 and tent with aluminium foil…Roast for a few hours ( depending on the size ) basting every 45 minutes or so….

;

;

oops….. dont hold it in the oven too long…. 😉

remove the bird when the internal temp in the leg is 165… then let rest.

;

ok.. so I have a story…. pull up a chair.. ( I LOVE storytime!)

Every year, after the dinner, we bundle up and take a walk.. ( like everyone else does 😉 So about 4 or 5 years ago, we were walking in downtown plymouth when we saw a rollerblader. Unusual? hmm.. not so much.

;

but the station-wagon chasing her ( clearly a family member) well… that was a bit odd.

;

The driver of the car was screaming at her ” get in the car…. I’ve got the turkey in the back seat” and she in turn was rollerblading as fast as she could screaming back to the driver ” I’m trying to get away form you.. can’t you see that?” and again…. ” but the turkey is in the back seat…

;

now I know we all have some sort of drama around the holidays ( myself included ).. and although I’m not making fun of what was happening…. when all was said and done… we all just looked at each other and said, did that just happen?

;

so our standard thing to say was ” there’s a turkey in the backseat”..

;

then I found this card…

;

ugh.. the pic is horrible.. but it is a station wagon full of turkeys!

So the following year, as we headed out for our walk . we were remembering the crazy walk from the year prior and discussed how we wouldn’t see anything that crazy that year….. so we decided to change that. We began the ‘Thanksgiving walk o Shame”

we all dress up in crazy attire and sing and dance and ‘decorate’ the downtown

;

this is a pic from last year

;

you can’t miss us… trust me 🙂 Its fun and like I said, we sing a dance around and remember all the little things that we are thankful for !

the pic is dark, but here is Jo & i from this year 🙂

;

I love crazy traditions… SO MUCH!!

;

so I’ll leave you with a few pics from our holiday…

;

;

<img class="alignnone wp-image-2580" title="Thanskgiving table with flowers form my kiddos

;

and lastly… I found this on the web… and decided to tackle it…. I am super proud of it..

;

It’s entirely edible!! I made it out of bread!!!!

;

one very last note.. you may want to re read I’m Thankful again…. I was afraid that I would leave some out and it turns out that I did….. and half of the paragraph about Scott disapeared… it made me sound heartless, really..

;

so I have updated it 🙂 smoooches!

;

;

now.. head back to the future! it’s Cyber Monday! .

a perfect week night meal

hi friends.

how have you been?  tough week for me, but I’m rallying thanks to some awesome family & friends 🙂


Ya wants a recipe? cool beans… I have one for you 😉


A few weeks ago I posted THIS quiche recipe. And truly, it’s awesome. It’s decadent. It’s worthy of my Easter table.


Let’s face it .. ANYTHING with pie crust is worthy. Yes? yes.

Which is why the recipe that I have to share with you tonight ( although still worthy of my Easter table) is just a little bit  easier to fit into a week night dinner line-up…  there is no crust 😉 Really? Really.


this recipe is thanks to my mother-in- law. She shared this with me when we were first married, and 10,000 years later, I still make it.


MANY years ago( like 165) when Scott and I were first married we had almost no money. He was in school still and I was a hairdresser and I picked up a shift or two waitressing when I could. Our grocery money was whatever I had earned in tips that week.. good or bad.. It’s what we lived with. Most weeks our budget ( for the 3 of us) was in the $30 range.


Ramen was good…. Boxed Mac & cheese was good. store brand spaghetti and jarred sauce were our friends.

I remember once, we bought a huge jug of peach wine. That just lasted us almost a year… ( who WERE we?) oh yeah… young and poor 😉


Funny thing is, the jug of wine came in a box  and I still havet that box… Scott’s Dungeons and Dragons stuff is still in there.


You think I’m kidding?

I could make this up if I tried.

[amd-zlrecipe-recipe:6]


I did not use pepperoni in this quiche… I used broccoli & red pepper… and garlic gold in place of garlic salt


a sprinkle of salt and pepper 🙂


pour mixture, then top with a bit of extra cheese


cheese is good. I called it.


I. KNOW!  RIGHT???  yum!!!!


so there ya have it folks…. inexpensive, quick and easy….


as the kids got older, I found myself throughout the week chopping up extra veggies each night ans saving them so that whatever night I made the quiche, I would pull out all of the veggies & they could ‘ make their own’ pie.


one last note.. since I brought up the D& D stuff I have to share that he actually took me on a date once to play D&D.


who was  I??


much love, friends…


oh one last thing.. if you follow me on Fb then you already know that Celia is the winner of the dryer balls.   I’m loving rafflecopter.  IT keeps track of all entries and is completely auto mated when it picks a winner….  That will make it easier for me to give ya’ll more stuff 🙂


xoxooxox

veggie chili

Friends.

I’ve hesitated.

I have a veggie chili recipe that I have pretty much been making for years. And I love it. but  I have a really good friend who is sort of a chili making champion.  She lives in Texas and they take their chili VERY seriously.  IN fact.. I have had the pleasure of tasting her chili… it truly is out of this world… You should  can visit her at River Cat Chili.

She is just back form a very big chili challenge that I’m sure she will be telling us all about soon.. and I have seen some of the pics.. and trust me… you wont want to miss this.

Sharing my measly chili recipe has had me intimidated.  But today… I feel strong.  I am going for it!

So the other day I defrosted chicken and had to decide what to make for dinner. Given the fact that I had more then just 2 to cook for, I needed to get creative.

This is my favorite way to cook. I have always said that if I were ever lucky enough to have a cooking show.. that this would be my ‘spin’

Open the fridge… take inventory… combine with pantry items and come up with 3 possible ideas.. and make one.

Which is exact-a-lacktaly what I did.

so what did I come up with? my veggie chili .. cooking the chicken on the side for those who wanted it. It was perfect.

I started by chopping the veggies and adding all but he garlic to a pan heated with oil

season with salt and pepper ( avoid salting the mushrooms)  and let everyone get a nice little crust.

after about 5 minutes, add the garlic, stir together, turn heat off, add wine to deglaze.

Turn the heat back on… once the wine has evaporated add some veggie stock and jarred tomatoes ( these were second to the last batch from last summer.. *snif*)

Let the chili come to a boil, then reduce and let simmer until sweet potatoes are tender. Stir in beans. ( I used beans that I had made in the crock pot and froze.. just because I go throught them so fast, but feel free to use canned)

For the chicken, I cubed it.. tossed it in spices and sauted in oil over med high heat.  Then added chicken broth to deglaze , covered and let simmer until  chicken had reached 165.

At the last minute, stir in some chopped cilantro or Parsley…  I served it with the chipotle cream sauce and it was perfect. ( I added the cooked chicken on top of those who wanted the chicken.

This is easy, healthy and yummy 😉  I finished the rest of it for lunch today with 1/4 of a chopped avocado and some fresh lime juice. It is a perfect meal for a fall day 🙂

* a note on the ghost pepper salt*

I have recently REALLY gotten into finishing salts. I can thank Ryan for this. I make a few of them myself (Lavender salt, Rosemary salt) but I’m a sucker when come across different flavors.  I am lucky That Ryan goes to school near a fabulous little tea and spice chop.. and every opportunity that I have I visit and he and I try out the different salts.

and sugars

and spices

and teas

We came across this one last weekend.. and although the ghost pepper is UBER hot.. ( bought some powdered ghost pepper this summer…  you only need a spec.. this stuff is strong.) I knew I had to buy it.

I have used this every day. yumm..

it’s awesome. like you!

what am I thankful for today? for you .. my readers…  you make my day.. seriously.. it’s nice having y’all as my bffs 🙂

oxoox[amd-zlrecipe-recipe:4]

%d bloggers like this: