♬♬♬back to school, back to school♬♬♬

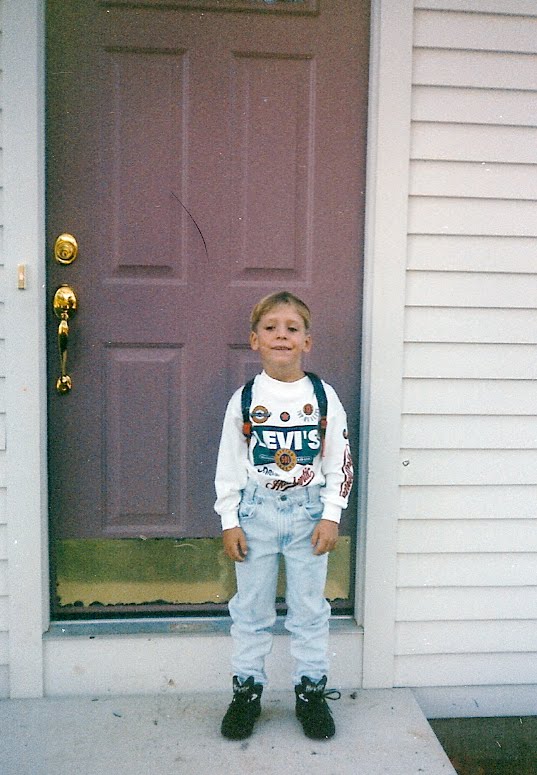
As you know, Alison started school last week, but Ryan had an entire extra week of his summer. His first day back to school was yesterday. If you read my post on Traditions then you know that not only was yesterday a school day, but also

Cookie Day!!!

Ryan’s request for his first day of school cookie was a cookie that my friend , Cheryl, makes only for the holidays.

She brings them to my annual cookie exchange each year

barefootgirl cookies

and it just might be Ryan’s favorite cookie of all-time..

peanut butter balls….

:full disclosure to my weight watchers friends.. enjoy this recipe, but don’t plan on anything else for the week in your WPAs.. you won’t be able to stop at one.. trust me 😉

you will need:

*2 cups peanut butter

*2 sticks of butter

*1 pound of confectioner’s sugar

2 cups of graham crackers

chocolate, for dipping

Start by creaming the peanut butter & butter together; add confectioner’s sugar.

OH. YEAH.!!

Stir in graham cracker crumbs.

Chill briefly ( this makes the next step easier 😉 )

Roll the mixture into bite size balls..

chill again.

melt the chocolate either in the microwave or on a double boiler. Dip each chilled ball into melted chocolate one at a time then allow to cool on wax paper or aluminum foil.

*this is where I let you down*

I can’t find the pic of the finished PB balls 😦 and as you can imagine.. they are all gone 😦 😦

I will go through past pictures, because I cam sure that I have a picture of these wonderful little treats all plated up, for for now, just imagine those peanut butter balls of goodness dipped in melted chocolate, then cooled to a nice chocolate crust.

easy & delicious!

Thanks, Cheryl!! for such a great recipe!


Oatmeal

I like LOVE oatmeal.  Like really, really love oatmeal.  So much in fact, that if I could MARRY oatmeal, we’d have been to Vegas YEARS ago!

And the best part…. it is SO good for you!!I’ve been hearing about ‘overnight oats’ for awhile now, but it took me until last month to google it to see exactly what they are…

I’m so glad that I did… I need up finding   Kath eats real food.  Kerf for short.  Not only is she an inspiration for her weight loss story, but her blog is very informative!!!!

So what did I learn there? All about overnight oats  😉

They are basically a oatmeal that you don’t cook!  You start by mixing your oatmeal with whatever liquid that you like the night before you want to eat them …

you can use any kind of oatmeal, but for me, I think that these are my Favorite!!!!

I mix 1/3 of a cup of TJ’s quick steel cut oats with 2/3 cup fat free milk.. I mix it in my cute little rubbermaid container, ( with the top on) give it a little shakey-shake and put in  them in the fridge and head off to sleep.

zzzzzzzzzzzzzz

In the morning, take the oatmeal from it’s cute container and that is your base for your oatmeal. The oats will have absorbed the liquid & are now ready to be topped with endless varieties!

I start by defrosting some frozen raspberries

then add the oats, milk & all

I topped it with a little bit of  ♥almond butter ♥ ( you could use peanut butter, but if you have the opportunity, & you like almonds, try the almond butter 🙂

This time of year, I am enjoying it cold, but if you prefer it warm, just warm it in the microwave!

This was yesterday’s breakfast..

This morning I topped my awesome oats with

Coconut butter!!

This is a new product to me. It is SOO cool.. It is stored at room temperature, & is the consistency of melted peanut butter but when it gets cold (like when added to my overnight oats) It gets a sort of ‘shell’ like the chocolate shell on an ice cream cone!! It is sooo tasty!! A bit on the pricey side, but I’ve been looking into a way to make it at home, making it far more affordable.

I also have my standard raspberries, 1/2 of a banana, a bit of almond butter & a sprinklin’ of slivered almonds

YUM!!  if you look closely you can see how the amazing coconut butter has hardened 😉

I can’t wait for tomorrow morning!

♥♥♥♥overnight oats♥♥♥♥

xoxox~shel

chicken sausage stuffed peppers

So  please, forgive me. It was 95 degrees in my kitchen last night so the fact that I even made dinner was HUGE!  I managed to take one picture of the final dish ( which was yummy) but I will walk you through how I prepared

Stuffed Peppers

I began with some wonderful green bell peppers that we received in our CSA share from Plato’s Harvest

http://platosharvest.wordpress.com/

I began by halving the peppers, cleaning out the ribs & seeds, & steaming them in the microwaves for about 4 minutes to soften them.

I actually made 2 different fillings. For both I used sweet italian chicken sausage & crumbled & browned it in a dutch oven.
for filling #1 ( my favorite) I had a cup of frozen wheatberries that I defrosted, I mixed 1/2 of the sausage, 1/2 cup of marinara sauce, 1/2 cup grated parmesan cheese, 1/2 red onion, chopped & 1 red tomato chopped.

For filling # 2, it was almost the same, switching the wheatberries for brown jasmine rice & the parm for mozzarella cheese

I spread a baking dish with some of the marinara sauce & filled each half of pepper with the filling & placed on top of the sauce. ( I baked all of them in the same pan.)

Sprinkle the tops of the filled peppers with a bit more cheese & a bit of olive oil.

bake in a *gasp* 350 degree oven until the cheese melts, about 10 minutes.

despite that fact that the weather so so dang hot, the peppers really did come out well. Why did I make 2 fillings? Well, I happen to LOVE wheatberries, the chewy crunch just makes me so happy. There was the possibility that the kids may have revolted… and ended up eating PB&J for dinner.

I knew that by mixing in some sauce with the brown rice that they would get whole grains without even knowing 😉

As it turned out, seconds were had by both AND, Ryan even ate the pepper!! mission accomplished!

I’m off to Trader Joe”s.. I need me some edamamee!!

oxox!

The funny thing about tradition…

.. is that you don’t always realize when you are actually starting one. Many years ago, our oldest (then only child) Jason, set out for his first day of kindergarden.

I was soo proud of him ( still am 😉 So the school bus picked him up at our front door and I set back inside. Lost. For the first time ever in my life, I was alone. Being such a young mom, I had gone from going to school, to going to work while he was with one of his grandparents during the day & my days off were spent with him, playing, teaching, watching him grow.

But as I walked back in the house, I realized that I really was lost.

Unexpectedly. Lost.

So I set out to my comfort zone, my kitchen.. and decided to bake cookies.

By the time the last batch was done, I heard the brakes of the school bus.. and he was home again.. running up the hill with papers in his hand, full of stories of his first day of school.

We sat on the living room floor while he emptied his back pack, had cookies & milk together while he shared all of his stories with me;)

A year later, as he entered first grade, we had another addition to our home…

Ryan had arrived.. when I sent Jason off on the bus, and Ryan had gone down for a nap…. I baked cookies again..

and a few years later, once Ali had arrived & our core family was complete, when Jay & Ry set off for school,

Ali & I .. you guessed …. baked cookies 🙂

I wasn’t until a few years later, when we had now moved on to our next home, where the bus stop was at the end of the street, so we had to walk home that I realized what I had done……

I walked to the bus stop to get Ry & Ali off of the bus on the first day of school and they both jumped off the bus and ran right by me.. they yelled back to me that they were racing home for the cookies. THAT’S when it occurred to me…

……I had started our very own tradition!

Jason is long out of school… and like I said, I am still very proud of him…

Ryan will enter his Junior year of high school next week..

and Ali started her sophomore year of high school today…….

and despite the fact that it is 95 degrees out, & I don’t have A/C…… you guessed it… I’m baking cookies !!!!

~because you don’t break a tradition 🙂

oxoxo

on another note….. this is what we have deemed ‘breakfast central’ in our house. While is was making Ali’s breakfast this morning…. take a look at who showed up trying to sneak a ride to school in her lunchbox!

Day at the farm♥♥♥♥

Today was the annual Farm Day at Plato’s Harvest Organic Farm  What is Farm day you ask? It is the day where Farmer Dave & his wife, Sasha organize a family fun day  right there on the farm complete with food, music, hayrides and of course the stars of the show, Plato & Einstein…and all of their animal friends.

It was a potluck.. so I decided to make this Edammame & white bean salad   Once I had made it, I felt like it wasn’t enough…. hindsight, I should have doubled it form the start. Unfortunately I did not have any more edamamme.. or cannelloni beans. So I improvised. I added a can of Chick peas, rinsed & drained and Black Beans, rinsed & drained. I also doubled the dressing since I was adding more legumes..

the result…

delicious!!  The pic doesn’t do it justice.. I was running late ( as usual.. where DOES the time go?) and took a quick shot once it was packaged to go. I was  disappointed that I had to add the extra beans, because I love the gentle flavors of the edamamme & cannelloni beans together with the rosemary & garlic oil, but when I went to grab the container at the end of the party, it was empty, so obviously, there weren’t any complaints.

*note to self* Tj’s trip this week…. you are out of edamamme….

Some pics from the day..

Farmer Dave Playing with Plato & Einstein

getting ready for the hayride

 wonderful music courtesy of the Lindsays

Hungry little fellows…

Grapes!!!
Scott & I picked some in hopes to be able to make some jam..
we weren’t able to enough because they were too high for us short folk, but we did stop & buy some organic California grown grapes on the way home to add, so hopefully jam will be in  our future 😉
Now we are home, I have a small batch of Sauce simmering on the stove…. a chocolate zucchini bread in the oven…. this time I tried in in a bundt pan…. I’ll let you know how it turns out  😉
and all is well in the world……. time for a glass of wine and some burgers on the grill on my last night of summer… in my kids’ eyes…. Ali ( my youngest) starts her Sophomore year of high school on Tuesday, so this is her last night of summer 😦   boy did that go fast!!!!
I’m not just talking about the summer ……
nighty night!!
oxoxo

homemade tomato sauce

When life gives you a summer n’oreaster


Make sauce!!! Lots & lots of sauce!!

Last week we received even more tomatoes in our CSA share from Plato’s Harvest Organic Farm

(yes, that’s a big, beautiful, juicy watermelon 🙂

Onto sauce…. I know that I posted my quick fresh sauce recipe, but now I’m going for the big guns.. the ‘stock the freezer’ sauce.. the ‘I like to pretend I’m an Old Italian grandmother’ sauce…

The sauce that I will defrost for my homemade ravioli on Christmas sauce.

Yup.. that’s the sauce..

Start by finding some big, comfy socks & turning on some corny 70’s tunes

♬♬♬  If you like Pina Coladas♬♬♬

Bring a large pot of water to a boil  & also fill a large bowl with ice water

♬♬ Getting caught in the rain♬♬♬♬

Turn your maters upside down & with a paring knife, make an X in the bottom

( I can’t see my X’s.. perhaps I took the picture first?)

go ahead, make the X

♬♬♬ and the feel of the ocean♬♬♬♬

When the water is boiling, add a few tomatoes at a time & let boil for just about a minute

( take a sip of your coffee )

♬♬and the taste of Champagne♬♬♬

then, using a spider or tongs, remove tomatoes & quickly plunge into the ice bath

The skins should easily peel away

♬♬♬ why don’t we peel away..baaam bamm abmm abaa baaamp..peel aaawwaay, into the  night♬♬♬

repeat with all of the tomatoes


( you can use this method to take the skins of of fruits like peaches & plums as well…)

When all of the tomatoes are skinned, dump the water from the stockpot , dry it, ( no need to wash it).. place back on the stove over medium heat & add some olive oil.

When the oil shimmers, add some chopped onion, carrots & celery… season with salt & pepper


yes, I have a purple carrot in there 🙂

once the veggies caramelize a bit ( you see a little browning ) add some finely chopped garlic ( add this right at the end, because if the garlic is in the pan too soon without liquid, it will burn & scorch & taste yucky)

))) burnt garlic((((

give the veggies one last swirl together

♬♬♬ Night Fever,  Night fevaaaaa  you know how to do it♬♬♬

then, start adding the tomatoes , cutting the cores out as you go..


WHOA!!  did you noticed how my pan changed colors???

♬♬♬♬Saturday.. in the park, I think it was the 4th of July♬♬♬♬

add a couple of bay leaves, kosher salt & pepper, some dried oregano & basil & bring to a simmer.

throw in some 80’s tunes

♬♬ I’ve had the time of my life.. no I’ve never felt like this before♬♬♬

and let your sauce simmer

and simmer

♬♬♬ Nothing’s gunna stop us now…♬♬♬

and simmer


your sauce will get thicker & a deeper color red as the day goes on…

stir it once in awhile and enjoy the amazing aroma..

♬♬♬wasting away again in Margaritaville♬♬♬

I let mine simmer for a good 4 hours. when the sauce is looking thicker… remove the bay leaves then..

you can do one of 3 things.

1) leave it thick & chunky, test for salt & pepper

2) let cool & blend in batches in a blender; test for seasonings
or
3) use an immersion blender to puree; test for seasonings

I personally don’t mind it chunky, but if I leave it chunky, I find that certain family members pick out some of the veggies; by pureeing the sauce, the eat them without knowing 😉

If you can eat it within a week, I store it in a mason jar, just make sure that it is completely cool before you put the lid on..

You also could can it at this point, but I chose to freeze it in portions in zip-lock freezer bags..

after, of course we had some with our sketti & meatballs last night.

This might seem like a lot of work to get from this

to this

but it is so worth it. If you have the opportunity to make sauce from scratch, I highly recommend it.

it is  very gratifying to look at the product at the end of the day.

not the mention to taste it 🙂

~oxoxo
michelle

♬♬everybody’s talkin’ bout the new sound honey, but it’s still rock & roll to me ♬♬♬♬

Summer. In a bowl :)

I know that I have declared my love of tomatoes before, so just bear with me while I do it again.

and again.

and again.

This week at Plato’s Harvest Organic Farm

our share  had 10  pounds of tomatoes!! 10 pounds.. this is NOT a typo 🙂 this is in addition to the pick your own varieties of salsa & cherry tomatoes 🙂

did I mention that  just LOVE tomatoes?

We also got to pick more string beans

I pondered over what to make for dinner last night, then it hit me like a brick…. I just HAD to make

Fresh tomato sauce

**** you need to use good quality, fresh tomatoes… all of the flavor in this recipe is based on simple, flavorful ingredients….  if you don’t have them growing in your yard, find a
Local Farmer’s Market
You’ll be supporting your local farms & farmers & I PROMISE you you will have the best tasting pasta dish on your table tonight*****

I used 3, maybe 4 tomatoes
2 garlic cloves
4 scallions
a healthy grating of parmesan
A few tablespoons of extra virgin olive oil
a handful of basil leaves

Put it all in my food processor & pulsed it a few times so that it blended but didn’t puree

season with salt & pepper

and Presto!

I like to add the cubed mozzarella right at the end on top of the pasta, but that’s just me, feel free to mix it all in if you please 🙂

This could not have been simpler or more delicious.

I made a batch of fresh pasta to go along with this. That’s a WHOLE other story… but one I will get to, I promise

 Since Ryan doesn’t really like tomatoes ( gasp) I also made a simple white sauce with parmesan for him. I put a little bit of the white sauce on my pasta with the tomato sauce.

This was heavenly. So much in fact, that I just had leftovers for breakfast 🙂

Panzanella salad

Let’s start with what we received from this weeks’s share of our CSA from Plato’s Harvest Organic Farm.

new this week were green peppers, scallions & asian eggplant
AND.. we were able to pick the gladiola!!!
oops…. here they are..
and in our bread share??? Stuffed garlic bread!! OH. Yeah.
And now, my favorite recipe of the week~
Panzanella.
 Funny word, eh?  When I first heard this I conjured up visions of brightly colored flamingo dancers. ( I have a wild imagination)

Panzanella is an Italian bread salad.  What, bread, in a salad? Oh, yeah. Trust me.
I based my recipe on Ina Garten’s Panzanella, but I did make changes, basically because I was trying to work with what I had.
I started by cubing the bread (day -old bread.. if you don’t have any, you can buy day old bread usually for half price in the bakery section of your grocery store~ use something rustic :)) & sautéing in in olive oil over medium heat…(don’t be afraid to add more olive oil while sautéing, you want the cubes to develop a crust)  seasoning with salt & pepper. Let cool.
There are many recipes out there, and not all of them have you saute the bread, but I find that the little scrumdilicious crust that it makes helps keep the bread form getting soggy.
In a large bowl, I added
a pint of assorted cherry tomatoes, halved
a few cucumbers, cubed
a red onion, cubed
1/2 yellow onion, diced
1/2 of a jalapeno, diced  ( I made this last week, prior to bell peppers, if you don;t like the bit on heat, feel free to omit)
I seasoned this all with salt & pepper
what’s great about Panzanella is that you really could add whatever veggies ( that you would eat raw) that you happened to have on hand 🙂
I made a dressing of :
1 small garlic clove, minced
1/2 teaspoon dijon mustard
3 tablespoons white balsamic vinegar
1 tablespoon honey
1/2 cup Extra-Virgin Olive oil
Kosher salt & Freshly ground pepper
you can make this in a bowl by mixing everything except for the olive oil together then slowly stream the olive oil in, whisking vigorously..
You can put all of the ingredients in a blender & whirl away..
or if you happen to have an immersion blender with one of those little mini food processor thingys.. well that works just perfectly.

this is an amazing little invention. Clearly on of my favorite kitchen gadgets.

salad dressing yumminess!

what I especially love is that I usually tend to not use all of the dressing in a recipe, (calorie-counitng & all) ~ so I just pop the top on & save it in the fridge right in it’s own container 🙂

Ok…back to the salad…

You can also make this dish ahead of time, keeping the dressing, the veggies & the bread separate until about 1/2 hour before serving.
at which time, simply toss them all together,( I use half of the dressing to start, then add more as needed) add a few tablespoons of capers, and some shredded basil leaves & a grating of lemon zest.
Let sit for about 30 minutes..


Now because I am a cheese NUT, I crumbled some ricotta salata over top. You could really add whatever cheese that you’d like, feta, goat cheese, even cheddar. Or, you could just omit it.I LOVED this dish. I served it with grilled steak tips and it went so well together. My only complaint about it was that went I went up for seconds, it was all gone 😦

Lucky for me, I just *happen* to have all of the ingredients on hand to make it again today 🙂

enjoy!
xoxoxo

Caprese Towers

This is what received last week from our share at Plato’s Harvest Organic Farm

Our basket is filled with tomatoes…  ahhh…..tomatoes…. my VERY favorite!!

*squeal*

look at these babies!!!

not to be under shadowed by the awesomeness that is the tomato… we also received some

purple carrots!

Before the recipe I’d like to share a story…

I loved to ‘play’ with food since I was a little girl. When I was about 4 or 5, my grandfather had made a make- shift stove for me in my grandparents’ back yard out of some tree stumps & plywood.

How is wish that I had a picture of that now…

My grandmother gave me some of her old pots & pans & wooden spoons. While my sister & her friends were playing normal kid things, I was mixing sticks & stones in my ‘kitchen’.

My grandparents has a backyard veggie garden. I remember one day thinking that it would be a great idea to pick ALL of their ripe tomatoes & try to make them into a sauce in my beach pail.

NOT such a good idea..

I’m sure that they were furious with me, but what I remember most about that day was sitting in the corner of their garage ( trying to stay out of view, I’m sure) trying, trying, trying to mix those tomatoes into sauce..

here is a picture of my sister, my aunt & I in front of the garage where I ‘created’ my first sauce. The garden is off to the right.

I’m the one in pink 🙂 some things never change…

Thank you for letting me share this.

now back to our regularly scheduled recipe..

I think that I (as I’m sure many) am SO excited about tomatoes due to the fact that last years’ crop was basically wiped out ( at least in the Northeast) by blight.

But this year.. they are amazing!

I made Caprese towers 🙂

simple, yet elegant ingredients

tomatoes ( we were lucky enough to have 3 colors but any color is fine)
Fresh mozzarella
basil leaves
Extra-virgin olive oil
Kosher salt
fresh cracked pepper

I love to prep all of my ingredients before I build. Just looking at this board makes me ♥smile ♥

assembling is easy.. just alternately layer tomatoes with the cheese.  Lay the basil leaves on top of each other, roll into a ‘cigar’ then cut small slices.. you will end up with ribbons of basil to sprinkle over the top. Season the towers with kosher salt & cracked pepper.. and drizzle with the olive oil..

Now I have to admit that I attempted to make a ‘basil oil’ prior to making these stacks.

I added a handful of basil leaves to my blender with about 1/2 cup of olive oil, salt & pepper.

Blend until the oil is green , then strain out basil leaves.

I did not like the color that the oil came out to be. The flavor was wonderful, but I think that the heat from the blades of the blender bruised the basil..

Next time I will try to blanche the basil first. When I made the arugula pesto last month, the blanching helped the pesto keep it’s beautiful bright color.

Mr. barefoot keeps telling me that when I make a mistake ( in the kitchen or otherwise ) that I’m not doing it wrong, I’m simply learning yet another way how NOT to do something.

wise man.

I’m not a chef, I’m not a teacher; I am someone who loves to learn & who enjoys sharing what I know & what learn along the way.

I’m learning every day;)

oxoxo

Herb marinated pork tenderloin

*discloser*   I cooked this prior to my last post regarding the death of my oven. I still don’t have an oven. I probably wont for at least a few weeks, but I will try to share recipes other than those that need my beloved oven…

Here is a great recipe for herb marinated pork tenderloin.

When buying the tenderloin from the grocery store, they often come shrink wrapped … When I buy them, I try to stay away from the pre-marinated ones. They are injected with a preservative solution ( I don’t really want any solution injected into my food, thank you very much).

This also takes the sodium levels out of control. The pork itself lends itself to be a wonderful blank palette to soak up whatever flavors that you choose, and making a marinade is so easy…. trust me 🙂

Sometimes I can get pork tenderloin from the butcher when it is on sale..I.. like getting it from the butcher because he trims it for me.  My butcher is very nice 🙂 When it is on sale I always buy one for the freezer.

The ones that are shrink-wrapped at the grocery store (without being marinated, RIGHT?) no injectable solutions for us 🙂 usually need to be trimmed a little. It’s quite easy to do. Lay the tenderloin on a clean cutting board & slip a knife just under a piece of the fat or silverskin.  Gently guide the knife & pull at the fat, not the pork. The fat should easily pull away..

Ok.. now that we are done covering that, I’d like to mention that in those shrink wrapped un-marinated packages, there are usually 2 tenderloins. Which means for the average family ( not that we are average by any means) you can get 2 meals out of it.

ok.. onto the recipe

 Mix the lemon juice, zest, mustard, salt, pepper & olive oil together in a large zip lock baggie ( preferably freezer bag I’ll tell you why in a minute.)

I used 1 lemon for the zest & 1 1/2 lemons for the juice. I must have had juicy lemons 🙂

Then I piled the herbs & garlic on the cutting board & chopped them all up together

and into the bag

add the tenderloins ( both of them, even if you are only going to cook one) into the bag & massage the marinade into the pork.

zip up the bag , pressing all of the air out & place in the refrigerator. Allow to marinate for at least 3 hours, but not more than 24.

When you are ready to cook the pork, if you are only cooking one, then pull that one from the bag onto a platter about 1/2 hour before you want to cook it. This is important because if you add cold meat to a grill or frying pan , the meat will seize up due to the temperature difference, allowing it to sit at room temperature insures that that won’t happen.

 Re-seal the bag  again pressing all of the air out. Label & date it & pop it in your freezer! Presto, you now have a make-ahead easy dinner for another night.  Now you aren’t supposed to re-use marinade, but technically you aren’t. You will just need to remember on that night in the future that you do decide to cook it that it has already marinated, so just defrost, toss marinade & cook 🙂

if you are cooking it inside follow the directions on Ina’s recipe.  I personally cook my pork to 145 degrees using a meat thermometer. If  you don’t have one, you really need to get one, nothing fancy, just your basic meat thermometer.

pork a-restin’


when the pork is done resting, cut it on a diagonal & viola!

This was delicious. and simple. and for a large part, do-ahead. and the best part is? I have another one just waiting for me in my freezer..

But next time I will have to cook it on the grill 🙂

ciao!