
A friend of mine is also trying to learn to make the paper-pieced hexagons. I have tried explaining it to her & decided that a short visual explanation might make more sense, since I really don;t know all of the proper terms & I have just started this myself.
From the research that I’ve done, there are many ways to do this; this is what I have found to work for me. If this doesn’t work for you, by all means try something different 😉
I purchased my paper hexagons I’m using 1 inch hexagons. Why? Just because 😉

I started by rough cutting my pre-washed & pressed fabric a seam- allowance bigger than my paper piece. It doesn’t have to be perfect, the straight-edge of the paper will create a nice, even line.

Next I place the paper piece on the wrong side of the fabric & use a straight pin to hold in place

Then I fold two pieces of the fabric over one corner, sort of like wrapping a present


I then use my thread ( I’m using white hand quilting thread) to pick up both pieces of the fabric in the corner, without going through the paper
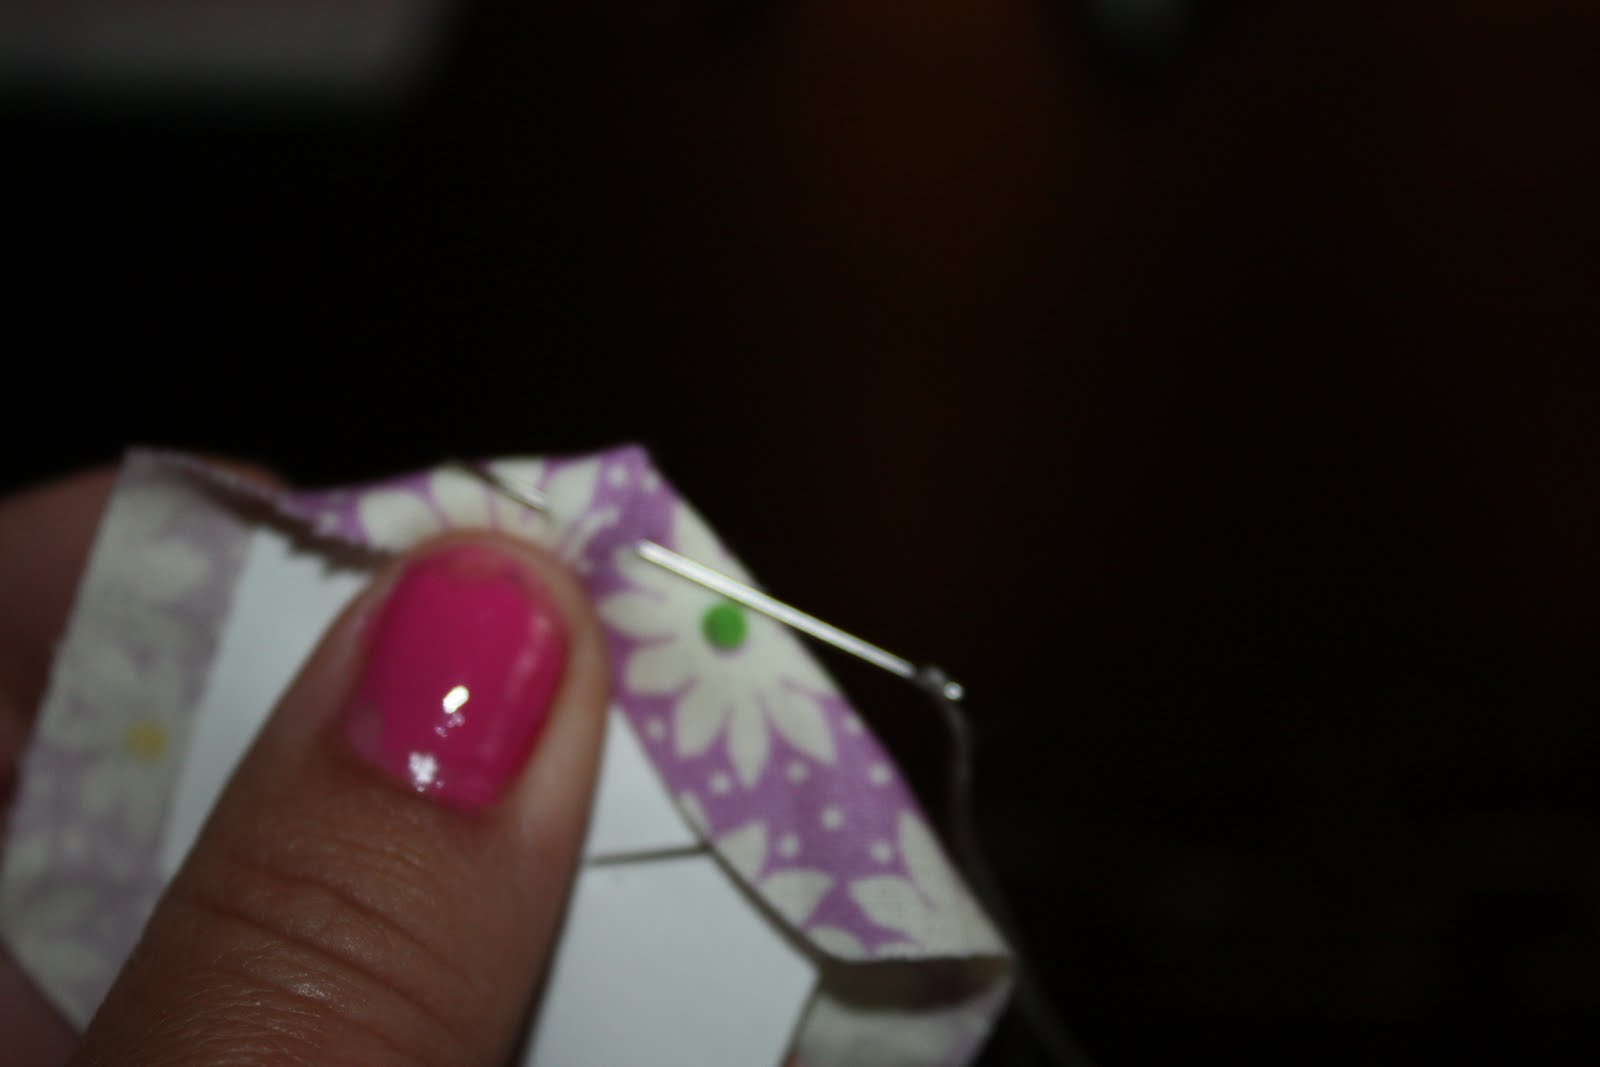
I stitched twice over the same area, giving the thread a brief tug to make sure that it was secure.
Next I move to the next corner, same thing.. I just make sure that my thread is taught, but not pulling.

Again, 2 stitches through both pieces of fabric
When all corners are stitched, I do a final stay stitch then cut the thread.
Make another (or 50, they ARE addicting!!) hexagons.
To attach them together, place right sides together & with co-ordinating fabric whip stitch the edges together.

Continue whipstitching the edges together in desired pattern..


Here is a view of the back…

I have not finished this flower yet, but when I do, I will update the blog ( I promise, it won’t be long)
When flower is complete, then paper pieces can be removed & reused. I think that I will only remove the inner-most pieces so that I have ‘body’ to work with when I get to the point of actually assembling all of my flowers to be into my quilt.
I hope that I haven’t confused you too much.. I welcome feedback from anyone who has suggestions on how I could improve these…
xoxoxo
michelle


Awesome – Thanks Shel!! oh and sexy thumb 😉
LikeLike
You are welcome.. and OH, Yeah.. sexy thumb 😉
LikeLike
Yay!!!
I am excited about this
Thank you so much!
LikeLike
I’m very excited for you to start! I know you’ll love making them ! Oxox
LikeLike